Changing for the better, one bite and (deep) breath at a time.

Monday, September 30, 2013

Grain-free Banana Nut Waffles (Paleo-friendly)

My intern Kelsey is at it again!  This girl loves to cook, and she has been making some delicious recipes for her family.  When I was in college, my specialties were salads with sliced tofu and Lean Pockets (ugh).  I'm so glad she got the "real foods" message at a much earlier age than I did, plus her time in the kitchen will be so helpful when she's an RD one day!

These waffles are gluten-free and can be refrigerated and reheated for future meals.  I have a feeling my Baby-led Weaning friends will love this for their littles ones!

************

From Kelsey:

When I was younger, my least favorite meal of the day was breakfast.  I have no clue what changed, but now I absolutely love breakfast.  In high school I would let myself sleep in until the last second, usually grabbing a bar or something quick to eat on my way to school.  Even though I now wake up earlier, I give myself a good 30 minutes to eat breakfast.  I guess my habit changed once I started taking nutrition classes and learned just how important breakfast really is for you.  It basically "jump starts" your metabolism for the entire day.  This is why I started doing research into different kinds of breakfast foods.

I got this recipe for Banana Nut Waffles from FoodBabe.  She has some amazing recipes, and I found this one while skimming through her page.  I hope you all enjoy them as much as I do.  They are such a big hit with my family that we even make them for dinner.

Ingredients:

4 eggs, slightly beaten
2 mashed ripe bananas
1 teaspoon vanilla extract
1/4 cup water
1 cup almond flour
1/4 teaspoon sea salt
1 teaspoon baking soda
1/2 teaspoon cinnamon
1/4 cup walnuts, chopped
Maple syrup for serving

Instructions:

Assemble ingredients.


Preheat waffle iron.  Assemble wet ingredients: eggs, bananas, vanilla, and water.


Add the dry ingredients: almond flour, sea salt, baking soda, cinnamon, walnuts.


Grease preheated waffle iron with cooking spray.  (I used the coconut oil spray from Trader Joe's.)

Spoon batter onto hot waffle iron.  Cook approximately four minutes or until timer goes off.


Mmmmmm....

Enjoy!

*M*

Thursday, September 5, 2013

All About Oats Part 3: Overnight Oats (Guest Blogger)

Meet Kelsey.


Kelsey is my wonderful intern.  I'm so excited to have her help!  Her sister Angie and I have been friends since college, and I have gotten to know their wonderful family over the years.  Kelsey will make an awesome RD soon.  Below is her first blog post about super popular Overnight Oats.  Enjoy!

*M*

**********
I am both excited and grateful to be a guest blogger and intern for this amazing site! I would like to share with you one of my favorite breakfast recipes. This recipe is essential to me since I am constantly rushing out the door in the morning, yet I still know that I need to eat something for breakfast (the most important meal of the day some will say). Right now I am a full time student at ASU, a volunteer at a hospital and a dance/tumbling instructor. My days consist of waking up and rushing out the door to the gym, rushing to get to school and rushing to get to work. I do find time to relax and do pilates and yoga every once in awhile!

I was first introduced to overnight oats at the Gilbert Farmer’s Market: Uprooted Kitchen. I was a bit skeptical because I was unsure if I would like oats that were chilled. After I tasted the first bite, I absolutely loved them. I then did a great deal of research on different recipes and found that the flavor possibilities were endless. I thought to myself, “I could make this every morning for breakfast and never get tired of it!” I am thrilled to share with you the favorite recipe that I have found for overnight oats. I have, no joke, been eating these for breakfast for the last week.

Overnight oats are a super quick and easy meal that will please anyone who likes flavored oats. 

Peanut Butter Banana Overnight Oats


Ingredients:
¼ cup Old Fashioned Oats (not the quick, instant or steel cut)
1/3 cup almond milk
1 ½ teaspoon chia seeds
¼ cup greek yogurt
1 tablespoon PB2 (peanut butter powder)

Optional:
1/4 cup walnuts
In the morning add:
1 banana
1 tablespoon hemp seeds
  
Instructions:

Assemble ingredients.  


Combine all ingredients in a jar and shake/stir it together. Let it sit overnight in the refrigerator or up to three days and enjoy! 


Once I take it out in the morning, I add a banana and 1 tablespoon hemp seeds for an extra crunch and protein.


Do not be afraid to try other ideas! I have only made the peanut butter banana but once I move pass my obsession with this flavor, I want to try blueberry maple, apple cinnamon, banana cocoa, etc.!!
 

Have fun and be creative! Hope you all enjoy!


Kelsey

Wednesday, July 24, 2013

New Product - Milk Miracles Healthy Lactation Cookies

I have learned to never doubt the power of positive thinking.  Since being laid of from a medical device start-up in January (yes, at 37 weeks pregnant), my 3 1/2 year full-time job, I wondered which direction my career would take in the post-Hannah world.  I was sure of one thing: I would never again compromise myself or my true passions, nutrition and wellness, and I would only take jobs that were in the best interest of my family.  I knew that if I kept a positive attitude and an open mind, something great would happen.

Something great didn't happen.  Many things great happened.  After going to a mommy group at Babymoon Inn, where my doula works, I was asked to join their team.  I now teach nutrition classes and meet privately with expectant and postpartum moms.  I had worked in maternal/child health before and was so excited to be in a positive, family-friendly environment surrounded by health-oriented people.  Oh, and did I mention the best part?  I can bring Hannah with me.  Yup, baby chills in her Ergo (or in the arms of other mommies or staff) while I teach and consult.  

My dream has always been to have a lot of part-time jobs so that I could diversify my skills and enjoy different aspects of the nutrition and health field.  I am lucky to continue to teach regular Karve classes at both the North Scottsdale and Old Town locations.  Additionally, I work for an online start-up called MyDietitian, and I just secured a great online teaching job with a major university (more on that later).  All of this can be done from home, or at least while my hubby is home, so I haven't had to rely on anyone but family for childcare.  "Blessed" doesn't even begin to describe how I feel.

Enter lactation cookies.  I was looking for a recipe to bake healthy lactation-promoting cookies for a friend who was struggling with milk supply.  What is a lactation cookie, you say?  Certain foods may help nursing moms create more breast milk.  These foods, including oats, flaxseed, and nutritional or brewer's yeast, are called "galactogogues."  Lactation cookies are simply cookies that contain these milk-promoting foods.  (In case you're wondering, and I know you are, no - they don't make you lactate if you aren't doing so already.  And they won't make your boobs bigger.  But they do taste good and are healthy for anyone!)

There are many commercially available lactation cookies on the market, but none of them are really "healthy."  They all seem to contain white flour and lots of refined sugar.  I was frustrated and decided on a whim that I would try to make my own healthy recipe.  I spent days baking and tasting various combinations using dates and a dash of stevia for sweetness and a variety of healthy substitutes for white flour, such as sweet potatoes, bananas, and coconut flour.  I spent more money than I care to admit at Whole Foods.


My sous chef:
 

I couldn't get it quite right, and I was about to give up on my little idea.  On my last try, I decided to add ingredients to one another and judge based on feel and taste of the batter, not worrying too much about what I knew should work.  Fortunately, I wrote down what I did, because they were good!  A few tweaks later and I had a recipe I was actually proud of...and they taste great too.

The best part?  They work.  I would wake up swimming in milk and was able to pump far more than I normally did during my once-daily pumping session.  Since I'm with Hannah all the time, I only pump to keep a freezer stash.  I never had a supply issue, but I had noticeably more milk and cut down on my pumping time dramatically.  

To clarify, if baby is making adequate wet dipes and is growing well, a breastfeeding mom has enough milk.  Sometimes moms need help with supply if they are struggling with latch at the beginning, have to pump at work, or are under a lot of physical or emotional stress.  I never want to imply that all breastfeeding women need these cookies.

I started giving away cookies to friends to see what they thought.  The reactions were even more positive than I expected.  "I didn't think I would like a 'healthy' cookie, but these are addicting," said one friend.  "I have milk for days!" said another.  Yet another pumping mom texted me a few days after getting her batch: "The last 2 days I have had no problem producing enough for her at daycare the next day!  Last week I had to supplement twice and today I even have an extra 3 oz. so far.  The only bad part is I just want to eat cookies all day...."  (I will take this as a good problem!)

Oh, and did I mention that they're actually healthy?  Gluten-free, dairy-free, no added sugars (except for the chocolate chips, of course), no salt, no refined flours.  The ingredient list is simple: dates, oats, virgin coconut oil, almond meal, chocolate chips, eggs, flaxseed meal, nutritional yeast, chia seeds, vanilla, aluminum-free baking powder, and stevia.  Think Lara bar with oats, but better.  Why eat a less than healthy cookie when trying to feed your baby the best?

{Please pardon my amateur - and really quickly done - photography!}


I call them Milk Miracles, as they have been a miracle in many ways for me.  They also remind me of what a miracle my little Hannah is, and how miraculous it is to be able to feed her from my body. 

I'm selling them to Arizona residents only for the time being, since I bake them in my home as allowed under Arizona's Cottage Law.  Eventually I hope to acquire access to a commercial kitchen and sell them across the country.  They are $20 + tax for 14 cookies, which is generally a 2 week supply.  Compare this to Milkin' Cookies ($21.99) or Milk Makers ($30 for 20 cookies), and I think they're a great deal.  Plus, these competitors aren't nearly as healthy as my Milk Miracles.

This is just the beginning of my journey, and I appreciate your support as I build this whole new element of my business.  If you are interested in purchasing cookies and live in Arizona, please email me at Megan@FindYourTransition.com or call/text 480-510-9634.

Enjoy!
*M*


Monday, July 1, 2013

All About Oats Part 3: Oatmeal Baked Chicken

I haven't blogged in a month because I'm working on a new special project in the kitchen.  I promise I will share it with you soon, as I'm really excited about it.  Until then, how about some chicken?

As you know, I have been cooking with oatmeal a lot more lately since oats are considered galactagogues (foods that help with breastmilk supply).  I haven't had any supply issues, but since I'm pumping every day to build up a freezer stash I'm trying to keep my supply really strong.  Plus, oats are a great way to sneak in soluble fiber and B vitamins, and they are a great substitute for breadcrumbs in many recipes.

The recipe below is adapted from Taste of Home but has been tweaked because I'm avoiding cow's milk.  It has a nice, hearty texture and was given the big thumb's up by the Mister.  I also didn't use nearly as much chicken as originally called for and made the recipe with organic chicken thighs.

Oatmeal Baked Chicken

Ingredients:
1 cup rolled or quick cooking oats (can opt for gluten-free oats as well)
1 T paprika
1 T garlic powder
1 T chili powder
1 tsp. sea salt
1/2 tsp. ground cumin
1/4 tsp. black pepper
1 1/2 lb. organic boneless, skinless chicken thighs
1 egg, beaten 
2 T melted pasture butter

Instructions:

Here's my sous chef with ingredients:


Coat a 8x8 inch baking dish with cooking spray or a bit of melted butter; set aside.  In a shallow bowl or large resealable plastic bag, combine oats, paprika, chili powder, salt if desired, garlic powder, cumin and pepper. 


In a separate bowl, dip chicken in egg, then coat with oat mixture.  I forgot to snap a photo, so here's one of my helper.


When I'm around hot surfaces I put her in her play gym on the floor, away from anything that could fall or splatter.  Safety around kiddos is imperative while cooking.


Place in prepared baking dish. Drizzle with butter.  (I simply cut up little pieces of butter and placed on top.)


Bake, uncovered, at 375° for 35-40 minutes or until juices run clear.  Serves 6.
 
While baking, prepare your side dishes...or just play with your 2- and 4-legged friends.


Nom nom, no?


Serve with a big green salad and sliced sweet potatoes drizzled with coconut oil and seasoned with cinnamon and sea salt.


She doesn't get to taste it (directly), but she loves to watch as we eat.  Family meals start early around here!


All done!


Enjoy!
*M*


Tuesday, May 28, 2013

My Next Thirty Years

I am just hours away from the big 3-0.  (In fact, by the time you read this, I may be well into my thirties.)  As a late May baby I have always been young for my grade, and I was usually one of the youngest employees in all the jobs I have held.  Getting older never really bothered me since I was happy with the direction my life was going, and heck - getting older sure beats the alternative. 

As a new mom I am acutely, painfully aware of the quick passage of time during especially wonderful experiences.  Every day I am stunned when the clock strikes 5 pm.  How did the day pass so quickly?  I remember recent times in an unfulfilling job when I couldn't wait for 5 pm, and now each day I both celebrate and mourn yet another sunset, another bedtime cuddle.  Turning 30 has reminded me that time is fleeting and days are not to be wasted.  For this reason, I am a bit sad to hit this aging milestone.  I am no longer truly "young," and time will only pass more quickly from here on out.  

Though turning thirty is bittersweet, it also provides me with an opportunity to reflect on my evolution, my personal nutrition transition, during the last decade.  I think back ten years, to my twenty-year-old self, and reflect on what a completely different person I was in so many ways.  I was well into my education to become a dietitian, but my motives were so different then than they are now.  My habits and behaviors, while seemingly healthy to an outsider, were destructive and depleting.  I am so grateful that time, experience, mentors, and trial-by-fire have completely transformed my daily thoughts, feelings, patterns and routines.  Below I will share some of these changes from 10 years ago (exactly!) to now in the hopes that you appreciate the transitions you have made with your own health. 

Home

Then - living with my parents for the summer after finishing sophomore year at U of A.

Now - living with my husband, daughter, and 2 crazy pups in the house we have owned for almost 5 years.

Work

Then - diet rep at Scottsdale Healthcare Osborn; taking 2 summer school classes at SCC.

Now - mish-mash of various baby-friendly jobs, including Babymoon Inn nutritionist, Karve instructor, My Dietitian RD, and consultant.

Diet

Then - RESTRICTIVE!  I thought that healthy meant low calorie, no matter what it was made out of.  My diet consisted of lots of low-calorie, fake foods, processed soy, diet sodas, sugar-free coffee drinks, fat-free salad dressings, and microwaved meals.  I never used salad dressing (besides vinegar or some fat-free crap), and I avoided nuts and other high-fat foods like the plague.  My favorite snack?  Fat-free microwaved popcorn sprayed with "I Can't Believe It's Not Butter" spray.  (I'm cringing as I write this.)  Right at this time I decided to "slim down for summer" and ate so restrictively that I had to take a nap every afternoon to accommodate my exhaustion.  I lost 10 pounds, but I gained a messed-up relationship with food that took years to heal.

Now - real, yet flexible.  I love food and try to avoid anything fake.  My diet consists of vegetables, fruits, sustainably-raised animal products, nuts, seeds, healthy oils, whole grains, and chocolate (usually in the form of cocoa powder).  I haven't touched soda in years and enjoy 2-3 glasses of red wine per week.  I minimize dairy and gluten because it helps me feel my best, but I love trying and enjoying all types of food.  Most importantly, I listen to my body.  I eat when I'm hungry.  I stop eating when I'm comfortably full (usually).  I try my best to eat slowly and mindfully, though that's a pattern that I'm still working on.  Food is no longer scary - it's exciting, but it's in its place.

Exercise

Then - hour-long walks in the heat twice a day, plus 1-2 hour sweat sessions at the gym, usually involving a torturous round on the stair climber.

Now - 45ish minute walks with the dogs, baby and hubby; 3-4 weekly Karve classes (plus teaching 2-3 times per week).  I love the exercise I do now and find it necessary for my sanity and energy levels.

Hydration

Then - water out of plastic bottles, SF-vanilla Starbucks lattes, SF flavored soy milk, diet sodas, far too much alcohol.

Now - water out of glass/stainless steel, kombucha, green/herbal tea, occasional coffee, moderate alcohol.

Self-Image

Then - very negative; all I cared about was what my body wasn't, not who I was.  I let my poor body-image get in the way of really enjoying myself that summer.  I avoided dinners out with friends and hated hanging by the pool.

Now - much improved; I am so amazed that my body could grow, birth (without medication, no less) and breastfeed a wonderful little person.  No number on the scale or pair of jeans could ever compare.

**********

When you become frustrated that you missed a workout session or ate just a bit too much cake, think back to how far you have come on your health journey.  I hope you are proud of your own nutrition (and health) transitions.  Your thirty-year-older self will thank you one day.

*M* 

Thursday, May 16, 2013

All About Oats Part 2: Old-Fashioned Meatloaf

Meatloaf goes over really well in my house.  My mother-in-law made it often for my husband when he was a kid, so he associates meatloaf with feel-good family memories.  When I look at traditional meatloaf recipes, however, I am not thrilled with the ingredients.  Enter this recipe, (surprisingly) from Paula Deen.  As usual, I have adapted it slightly to include ingredients I prefer.

I like this recipe because everything goes into a bowl, which is then transferred into a pan.  There is no pre-cooking or extra steps, so it only takes a few minutes to assemble.  Plus, you can double the recipe and freeze the raw, prepared meatloaf to pop in the oven after you it has thawed in the fridge weeks (or months) later. Plus, it contains oats, which are not only a good source of soluble fiber but may help improve milk supply for those who are nursing.

Make sure to use grass-fed beef, which can be found at your local farmer's market and many health food and grocery stores.  Grass-fed beef, as opposed to corn/grain-fed beef, contains 3 times higher omega-3 fatty acids and is a great source of conjugated linoleic acid (CLA), which is anti-inflammatory, cancer preventive, and may help with fertility.  When the animal eats what is meant to eat, the meat from the animal is much healthier.  You really are what you eat.

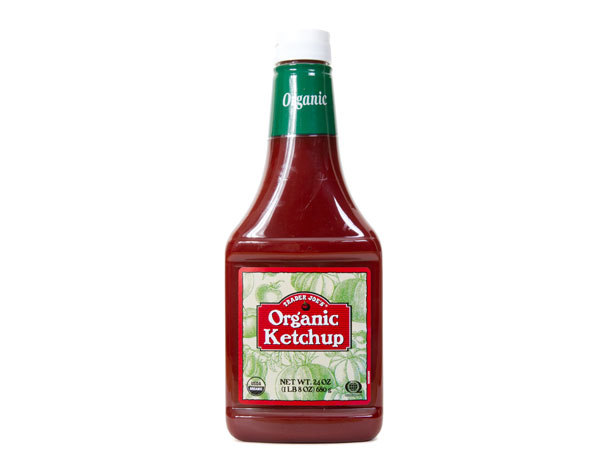
When choosing ketchup, check the label.  Many "mainstream" ketchup brands contain high fructose corn syrup, which increases your risk for fatty liver disease, heart disease, and overall inflammation based on the way it is metabolized by the liver.  I usually pick up organic ketchup from Trader Joe's, but even some mainstream brands are starting to switch back to plain ol' sugar instead of HFCS.  I think companies are starting to listen.  If you want to get really adventurous and make your own ketchup, check out this recipe.


To avoid BPA, a potential carcinogen, buy canned foods from manufacturers who avoid using BPA in their can liners.  Muir Glen, Eden Organics, and Amy's, all found at Whole Foods, Sprouts, and other health food stores, are BPA free.  Check out this interesting blog post regarding BPA in your favorite brands.


Ingredients: 
 

1 lb ground grass-fed beef
1 1/4 teaspoon salt
1/4 teaspoon ground black pepper
1/2 cup chopped onion
1/2 cup chopped bell pepper
1   egg, lightly beaten
8 ounces canned diced tomatoes (without juice) - I used Muir Glen Fire Roasted
1/2 cup quick-cooking oats - I used old fashioned oats


Topping:
 
1/3 cup HFCS-free ketchup
2 tablespoons raw honey (can use less or sprinkle stevia)
1 tablespoon prepared mustard

Instructions:

Preheat oven to 375 degrees F.  Mix all meat loaf ingredients well and place in a baking dish.  (Note: I doubled the recipe in these photos.)


Shape into a loaf or use a loaf pan. 


Mix ingredients for topping and spread on loaf. Bake for 1 hour.  Remove from the oven, let cool slightly, and cut into slices.

This is what you get, especially if you fail to cut your onions into small pieces...


I served this awesome meatloaf with roasted Brussel sprouts, gluten-free bread (Pamela's GF bread mix), and a strawberry spinach salad with goat cheese and walnuts.  I even got fancy and lit some candles...not a usual occurrence with a 3-month old at home!  However, small touches like these help make the meal more of an enjoyable "event" than just a time to refuel.  When you enjoy your food, you're more likely to eat just enough of it - not more than your body actually needs.


Enjoy!
*M*

Thursday, May 2, 2013

All About Oats Part 1: Homemade Granola

Granola has long held the reputation as a "natural health food," yet the nutritive benefits of most store bought granola are greatly diminished by high quantities of refined sugar and inflammatory vegetable oils.  Enter this homemade granola, adapted by yours truly from Alton Brown's Food Network recipe. Oats can be a great way to add soluble fiber, magnesium, and immune-boosting beta glucans to your diet, but sometimes plain old oatmeal can get a little routine.  (Getting bored with your oatmeal?  Check out this post on creative ways to spice up your oatmeal.)  Side note: make sure to always add some protein to your oatmeal, perhaps in the form of nuts, stirred in peanut butter, or even some protein powder to make your breakfast more well rounded and satisfying and to prevent a mid-morning blood sugar crash.  

I have been eating and baking with oats more often lately because they may help with breastmilk supply, and with four close friends having April babies I'm trying my hand at more oat-based recipes as gifts.  I love this adapted recipe, below, because it combines oats with dried fruits, dried unsweetened coconut, coconut oil, and nuts - all nutrient powerhouses.  Plus, with the fat and protein in the nuts and sweetness from a bit of honey, maple syrup and stevia, it causes much less of an insulin spike than your typical bagged granola.  Enjoy this granola atop organic Greek yogurt, mixed with almond milk and sliced banana, or just plain out of the bowl as a snack.  It stores well and makes a great gift, too!

Healthier Homemade Granola

Serves 6

Ingredients:

3 cups rolled oats
2 cups raw or dry roasted nuts (I used walnuts, almonds and cashews)
3/4 cup unsweetened shredded coconut or coconut flakes
1/4 cup honey
1/4 cup real maple syrup
1/3 cup organic coconut oil
1/2 to 1 cup raisins, cranberries or other dried fruit
3/4 teaspoon sea salt
Dash stevia
Cinnamon to taste

Instructions:

Preheat oven to 250 degrees F.  In a large bowl, combine oats, nuts, coconut and dried fruit.  


Combine all other ingredients in a separate bowl.  


Pour liquid mixture over oat mixture and pour onto two sheet pans. 


Cook for 1 hour 15 minutes to achieve an even color.  Mmmmmm...can't you smell that coconutty goodness already?  (Yes, coconutty is a word!)


Remove from oven, cool, and store in a glass bowl or containers.


Here was my breakfast - granola, almond milk, and bananas!  It was super fast, satisfying and definitely fulfilled my granola craving.  Plus, I am getting plenty of healthy fats - especially lauric acid from the coconut - which is so important for breastmilk quality.  (Not breastfeeding?  Coconut is awesome for your immune system, thyroid, and metabolism.)
 

Enjoy!
*M*