Changing for the better, one bite and (deep) breath at a time.
Showing posts with label Chocolate. Show all posts

Monday, June 2, 2014

No Bake Energy Bites

Summer is the time to make meals easy and cool, especially in Arizona.  We're not particularly motivated to heat up the kitchen when it's approaching 120 degrees outside.  My nursing mama friends out there will especially enjoy this recipe because it includes oats, a galactogogue.  Thank you to our recent college grad and wonderful intern Kelsey for this delicious treat!

*M*

-------------------

I have really been in a dessert mood lately. I have been making Megan’s GF Peanut Butter Dark Chocolate Bars on a regular basis and they have been satisfying my sweet tooth! I decided to test out a new dessert/snack from Gimme Some Oven that incorporates sweet items such a chocolate but is also very nutritious.

I have always liked chia seeds but never realized how good they were for you until about a year ago. This ancient super-seed has more omega-3 fatty acids than salmon, ounce for ounce.  Omega-3 fatty acids build new cells and regulate various processes of the body. Unfortunately, our bodies cannot make omega-3 fatty acids, so we must consume them. When I find myself consuming high amounts of essential fatty acids, I always see a difference in the growth of my hair and nails. This is because they can aid in beautiful hair and nails. This seeds can also contribute to heart health. In addition, chia seeds can help curb your appetite and add fiber to your diet.

You can have these as a snack between meals or even as a dessert like I do!  

No Bake Energy Bites

Ingredients:

1 cup dry oatmeal (I used old-fashioned oats)
2/3 cup coconut flakes
½ cup peanut butter
½ cup ground flaxseed
½ cup chocolate chips or cacao nibs
1/3 cup honey or maple syrup
1 tablespoon chia seeds
1 teaspoon vanilla extract

Instructions:

Assemble ingredients.


Mix all ingredients together in a medium bowl until thoroughly mixed.


Cover and let sit in fridge for approximately 30 minutes.

Then roll into balls and store in an airtight container and keep refrigerated for up to a week.


Makes about 20-25 energy bites.
  
Enjoy!


Kelsey

Sunday, January 12, 2014

GF Peanut Butter Dark Chocolate Bars - Revamped

My all-time favorite baked good is this delicious gluten-free peanut butter chocolate chip cookie.  It can be made with different types of mix-ins (including dark chocolate, peanuts, or dye-free chocolate candies - instead of M&Ms) stuffed with peanut butter cups, or can be made into bars by pressing into a baking dish.  I like them because they're simple (everything is in increments of "2") and I always have the ingredients on hand, but they always contained regular ol' brown sugar.

Until now.

Enter coconut sugar.  


Coconut sugar is made from the sap of the coconut plant.  It is less processed than brown sugar, has more nutrients, and may have a lower glycemic index.  Should we be putting coconut sugar on everything?  No.  But it's better than brown sugar, and since this is my favorite dessert I'm thrilled to have a slightly healthier alternative that works just as well.

My Karve FUEL Challengers went nutso about this treat on Saturday as we practiced eating mindfully and intentionally.  I am ever so happy to indulge their chocolate and peanut butter combo craving.

Peanut Butter Dark Chocolate Bars

Ingredients:

2 cups smooth peanut butter
2 cups coconut sugar
2 eggs
2 tsp. baking soda
1 1/2 - 2 cups dark chocolate chips or chocolate chunks - try Enjoy Life brand 

Instructions:

Cream peanut butter, coconut sugar, eggs and baking soda until smooth.  Stir in chocolate.  


Press into an 8x8 baking dish and bake at 350 degrees for ~30-35 minutes or until slightly browned.


So.  Good.

Enjoy!

*M*

Sunday, October 7, 2012

No Bake Dark Chocolate PB Oatmeal Bars

I did it!  I developed my own recipe!  (OK, I usually tweak any recipe I use to make it more Meg-a-fied, but this time I developed it on my own!)  I wanted to make a healthier no-bake cookie or bar that could also sub as a pre- or post-workout snack and had the two flavors I love the most: chocolate and peanut butter.  The result?  These fun little oatmeal bars that are great as a dessert, sweet snack, or even breakfast on the go.  Chocolate for breakfast, you ask?  Better (and more satisfying) than a chocolate doughnut!

This recipe is made up of some of my favorite nutrient-rich foods:

Cocoa powder and dark chocolate - full of phytochemicals (flavonoids, theobromine) that are cardio-protective and lower blood pressure.  Most of us love chocolate, and combining cocoa powder with coconut oil and a bit of stevia forms a nice chocolate "sauce" that's also super healthy.

Coconut oil - this once demonized oil has been heavily researched in the past decade and is now understood to be quite health-promoting.  We now know that it is beneficial to your heart and thyroid, and it may boost your metabolic rate and immune system strength.  Coconut oil is made up of medium chain triglycerides, which are preferentially metabolized and used for fuel by the liver.  (Polyunsaturated fats are made of long-chain fatty acids, which are harder to metabolize and are preferentially stored for fuel.)  Much of the research vilifying coconut oil was performed on oil that was partially hydrogenated; virgin coconut oil is what you want to reach for.  It is solid at room temperature but melts easily, especially if kept in an Arizona kitchen (mine is usually liquid after a few days in my pantry).

Peanut butter - great source of protein, adds satiety to meal, and thought to lower cholesterol and triglyceride levels.  Plus, it's just plain awesome.

Oatmeal - full of soluble fiber, which is thought to bind to LDL cholesterol and "sweep" it away from arteries.  This makes oatmeal heart healthy and a good whole grain option, if you eat grains.  Oats are naturally gluten-free, but many crops are cross-contaminated with wheat, rye or barley, or they're processed in facilities that also process gluten.  If you are gluten intolerant, opt for gluten-free brands like Bob's Red Mill, Holly's Oatmeal, or GF Harvest.  The less processed the oats, the more slowly they will be digested, so opt for traditional oatmeal or steel cooked oats whenever possible.  You can make oatmeal overnight in the crockpot to save time.  I used old fashioned oats for this recipe.  

Honey/stevia - I only used a small amount of honey, which has antimicrobial properties and is high in B vitamins, in this recipe, but I recommend it (and stevia) over other sweeteners because of its health benefits and minimal processing.  Plus, if you buy honey made in your local region, it may help you manage seasonal allergies a bit better.

This recipe is pretty dense and "oat-y" but has a strong chocolate peanut butter flavor.  If you don't like oats as much, you can reduce the quantity.  You can also make this lower in carbohydrates by reducing the honey (increasing stevia), eliminating the chopped dark chocolate, and swapping out 1 - 1 1/2 cups dried coconut for the oats.

Ingredients:

1/3 cup + 1 tablespoon coconut oil
3 tablespoons honey
Few dashes of stevia (to taste)
1/4 cup unsweetened cocoa powder
1 teaspoon vanilla extract
1 cup smooth peanut butter
2 cups old fashioned oatmeal
3-4 ounces dark chocolate chopped (optional; about 1 bar)

Instructions:


Add 1/3 cup coconut oil, honey, stevia, and cocoa powder to a small saucepan and heat until gently boiling.  


Remove from heat.  Stir in vanilla extract and peanut butter until well combined.  


Fold in oatmeal and chopped dark chocolate.  Drizzle with 1 tablespoon coconut oil to help bind the mixture.  


Spread evenly into an 8x8" baking dish and refrigerate to set.  


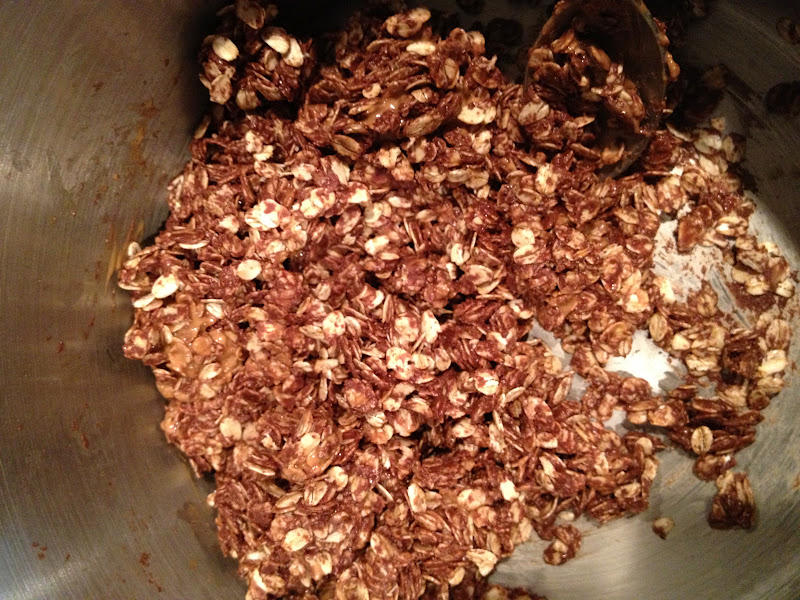
Cut into 12-16 squares and served once set.  Look how dense and yummy these are!  


I am considering freezing a few pieces to see how that goes, too!  Greg and I love having these in the fridge to satisfy our sweet tooth without a ton of sugar.  Let me know how you like them!

Enjoy!
*M*

Sunday, April 22, 2012

Grain-free Chocolate Chip Scones

As my regular readers and good friends know well, I'm a baker.  I learned to bake well before I touched a skillet or held a paring knife.  I love creating beautiful, sweet treats that fill my house with wonderful smells.  I can easily pull together traditional cookies, cakes, pastries, muffins, and breads, but I enjoy the extra challenge of making them healthier.  If I can get my husband, friends, and coworkers to enjoy more wholesome options and crave them as much as the "regular" version, I consider the recipe a success.

Greg and I really like scones.  They're delicious dipped in almond milk, coffee, or even a frothy cappuccino.  Most traditional scones are made with white flour and sugar, which can be inflammatory to the digestive tract and can raise blood sugar and insulin levels when eaten regularly, leading to increased disease risk over time.  These scones, adapted  from The Healthy Cooking Coach, are made with almond flour, which is basically almonds that have been ground to a fine consistency.  They also contain honey, a sweetener I prefer over refined sugar because it is a good source of minerals and antioxidants and has antimicrobial properties.  I loved this recipe because I already had all of the ingredients in my pantry!

Ingredients:

2 1/2 cups blanched almond flour (mine is from Trader Joe's)
1/2 teaspoon sea salt
1/2 teaspoon baking soda
1/3 cup melted extra virgin coconut oil
1/4 cup honey
2 large organic eggs
1 cup coarsely chopped dark chocolate (I happened to have unsweetened baking chocolate and added some stevia to make up for the bitterness of the unsweetened chocolate)

Instructions:


Preheat the oven to 350°F. Line 2 large baking sheets with parchment paper

In a large bowl, combine the almond flour, salt, and baking soda. 


In a medium bowl, whisk together the grapeseed oil, agave nectar, and eggs.

Coconut oil


Stir the wet ingredients into the almond flour mixture until thoroughly combined, then fold in the chocolate. 


Drop the batter, in scant 1/4 cups 2 inches apart, onto the prepared baking sheets.


Bake for 12 to 17 minutes, until golden brown or a toothpick inserted into the center of a scone comes out clean. Let the scones cool for 30 minutes on the baking sheets, then serve. 


Check out who was helping me bake:
Miss Molly Malone was over for a play date


Enjoy!

*M*

Tuesday, March 27, 2012

Dairy-free Chocolate Cashew Butter Cups

I love having frozen chocolatey desserts on hand when a sweet craving strikes, and my usual go to is healthy fudge. In efforts to mix up my routine, I tried cashew butter cups from Dr. Ben Kim's website - and they are divine. I had made them before, but this time around I added the optional cocoa nibs to the filling, and their crunch and texture made this recipe one I will make time and time again. My husband, an ice cream fanatic, satisfies his sweet tooth with half of one of these dense, flavorful treats and doesn't need to head to Cold Stone.

If you have never used cocoa nibs, I urge you to give them a try. You will find them at Whole Foods or other health food stores. I especially enjoy Navitas Naturals brand. Cocoa nibs are made from the cocoa bean; they're pieces of dried, fermented and crushed bean that have a strong cocoa flavor and are chock full of flavonoids, antioxidants, and blood pressure-reducing power. Read more about cocoa nibs and how to use them here. I personally love to put them in my flourless banana bread (coming to the blog soon!), smoothies, and other healthy desserts.

These chocolate cashew butter cups are great because they're made with the nutrient powerhouses listed below:

Cashew butter - rich in healthy fats, iron, phosphorus, calcium, magnesium and zinc
Coconut oil - high in heart-protective medium chain triglycerides and has antiseptic qualities
Cocoa nibs/cocoa powder - heart healthy chocolate without added sugar or soy lecithin
Honey - a natural sugar that also contains minerals and fights germs

Note: I doubled this recipe to make 12 large cups, which I cut in 1/4 or 1/2 for each serving.

Ingredients

Chocolate ingredients
1/2 cup cocoa powder
1/4 cup honey (you can sub some liquid stevia here if desired)
1/4 cup coconut oil

Filling ingredients
1/2 cup cashew butter
1 T cocoa nibs (optional - I'd recommend more, perhaps 2 T)
1/2 T honey (I used stevia)

Instructions


Mix the ingredients for the chocolate together. Make sure to mix well.


Use a spoon to spread this mixture on the bottom and up the inside of each cupcake liner (note: I was out of liners so just placed these directly in the pan; not as clean but works just fine). It helps to spoon a large glob of the mixture into the liner and then spread it in a thick layer.

Put these prepared liners in the muffin pan (to help each cup maintain its shape) and place in the freezer.


Set aside the chocolate mixture that's left over; you'll use it in a few minutes.

While the cups are resting in the freezer, mix the filling ingredients together. Make sure to mix well.


Once your filling is ready, take the muffin pan out of the freezer and fill each cup with the cashew filling. Make sure you leave enough room at the top of each cup for a final layer of chocolate.

Place the cups back in the freezer for 10 minutes.


Once the 10 minutes are up, bring the muffin pan out and top off each cup with the rest of the chocolate mixture. Place the muffin pan back in the freezer for 20-30 minutes to let the cups harden. Then peel the cupcake liners off and enjoy!


Here's my iPhone camera attempt to show you the cocoa nibs in the center:


Please note: These chocolate cashew butter cups get harder and more enjoyable with each passing day, so consider saving a few to enjoy as an after-dinner dessert a day or two after making them.

Make sure to keep these puppies frozen; otherwise, they get messy as they melt!

Tell me, what's your favorite dessert ("healthy" or "play")?

Enjoy!

*M*

Monday, December 19, 2011

Happy Holidays 2011

Happy holidays! We often show love to each other and celebrate with food, and this year was all about the goodies! None of these are particularly "healthy" options - though the cookies are technically gluten-free - but this is where balance comes in. "Play" foods are important for us too!

I wanted to make a platter for my office and one for my husband's coworkers, since he just started at his new job (and let's face it: chocolate helps make friends). I also put a few of each treat in little grey felt "buckets" purchased from Target, each adorned with star-shaped cookie cutters. Check out the photos - and recipes - below!

For Greg's office:


For my office:


For my neighbors - aren't these little ($1) buckets cute?


To check out the gluten-free peanut butter chocolate chunk cookie recipe, go here. Instead of stuffing them with regular or small Reese's peanut butter cups, I used the teeny Trader Joe's chocolate PB cups mixed into the batter, plus chunks of dark chocolate cut straight from the bar.


No-bake Peanut Butter Oatmeal Cookies with Chocolate Drizzle

Ingredients:

2 cups sugar

1 stick butter

1/2 cup milk

1 cup peanut butter

1 tablespoon vanilla

3 cups oatmeal

Melted dark chocolate, optional

Directions:

In a heavy saucepan bring to a boil the sugar, butter and milk. Let boil for 1 minute then add peanut butter, vanilla and oatmeal. Spread the mixture on a greased baking dish and let cool. Once cool, drizzle with melted dark chocolate. (Adapted from Food Network.)

I forgot a picture, so use your imagination!


Magic Bars

My husband is obsessed with Magic Bars. Of course, he calls them 7-layer bars; however, everywhere I go they're called Magic Bars, and technically they do not have 7 layers, so obviously I'm in the right.

Ingredients:

1/2 cup butter
1 1/2 cups graham cracker crumbs
14 ounces sweetened condensed milk
1 bag semisweet chocolate chips
1 bag butterscotch chips
3 1/2 ounces coconut flakes
1 cup chopped walnuts

Instructions:

Preheat oven to 350 F. (325 F. for glass dish.) In 13x9-inch baking pan, melt butter in oven. Sprinkle crumbs over butter; pour condensed milk evenly over crumbs. Top evenly with remaining ingredients; press down firmly. Bake 25 to 30 minutes or until lightly browned. Cool thoroughly before cutting. Store loosely covered at room temperature. Makes 24 bars. (Adapted from Cooks.com.)


Happy holidays from our (crazy) little home to yours!


Photo - Jessica Flecky, Flecky Fotography
Card - Rachel Harding, Just Us Three

*M*

Friday, September 30, 2011

Gluten-free Peanut Butter Chocolate Chip Cookies Stuffed with Peanut Butter Cups

Oh my. You are going to love these cookies. Full disclosure: these are less "healthful" than they are "play," but we need both in our lives! These cookies are really, really good - and very rich. And fortunately, they're something your gluten intolerant friend can enjoy as well. Those of you with kids (or grandkids) will also enjoy this minimal-ingredient recipe. Making it for your significant other? You'll look like a goddess - or god - in the kitchen!

These cookies are pretty big, so they're perfect for splitting with a friend. Plus, cutting them down the center lets you see the surprise peanut butter cup inside!

Heat oven to 375 degrees F. Start by making the extremely simple gluten-free peanut butter chocolate chip cookies I featured last fall on my blog. Note: instead of making this recipe with M&Ms, use only chocolate chips (and used the whole bag of chips because I love my cookies chocolate-y). I also used chunky peanut butter because that's what I had on hand.


Next, flatten a round of dough on a prep surface or cookie sheet.


Place a Reese's peanut butter cup on top of the "bottom" layer and press down gently.


Add an additional round of dough on top of the peanut butter.


Press the sides of the top and bottom layers together to conceal the peanut butter cup.


Arrange evenly on a cookie sheet and bake for 12-14 minutes, making sure to not burn the bottom.


Remove the cookies when they're still slightly soft on the top, since the bottom tends to darken more quickly.


Cool on a cookie sheet and serve with a glass of cold, organic milk or almond milk.

Enjoy!

*M*