Changing for the better, one bite and (deep) breath at a time.
Showing posts with label Nuts. Show all posts

Tuesday, March 25, 2014

All Hail Kale Salad

We are back!  I just finished my first of two lactation educator course on my road to becoming an IBCLC (International Board Certified Lactation Consultant - basically a breastfeeding expert).  I don't think I have been so busy in my life!  Balancing teaching online for ASU, teaching Karve classes and prenatal nutrition classes, seeing clients, and making Milk Miracles cookies plus at least 12 hours of course work per week - on top of being a "stay at home mom" - makes me grateful that I survived the last few months!

Intern Kelsey is almost no longer a student intern.  Soon she will be a dietetic intern and will be on her on road toward being a registered dietitian.  I am so proud of her!  We find out what program she matches to in a few weeks, and I am confident that she will find the perfect spot for her!

Megan

********************

From Kelsey:

I am very excited to be sharing with you this recipe I found online from one of my favorite restaurants, Veggie Grill.  Veggie Grill was a new discovery by my family and me a few years ago when we were shopping at The Grove in Los Angeles, California.  Sadly, there are no locations in Arizona yet, but we are hoping that this will change soon!  This past December I was able to go to San Diego and my family and I ate there three out of the four nights.  The restaurant is completed vegan and, like this salad, is appealing to almost everyone.

Another reason I LOVE this salad is because it contains one of my most favorite super foods, which is kale.  Let me give you a little background on how good kale is for you.  It is low in calorie, high in fiber and has zero fat.  Kale is high in iron, Vitamin K, Vitamin C and calcium.  In addition, it is a great anti-inflammatory food, containing 10% of the RDA of omega-3 fatty acids.  Omega-3 fatty acids can help fight arthritis, asthma and autoimmune disorders.  If that isn’t enough to make you want to try some kale, let me just tell you that this salad contains the most amazing caramelized walnuts.  Yep, I thought that might do the trick!  Hope you all enjoy this nutritiously astounding salad from The Detoxinista’s blog page. 

All Hail Kale Salad


Maple Glazed Walnuts

Ingredients:

2 cups walnuts
1/3 cup pure maple syrup
1/8 teaspoon fine sea salt

Instructions:

In a large skillet over medium heat, combine the walnuts, maple syrup and salt.


Stir often, until the walnuts are toasted and the maple syrup is caramelized, about 3-5 minutes.

Papaya Ginger Dressing

Ingredients:

½ cup papaya chunks
¼ cup fresh lime juice
2 Tablespoons apple cider vinegar
2 Tablespoons extra virgin olive oil
¼ cup honey
¼ teaspoon fine sea salt
¼ cup water, or more to thin

Instructions:

In a high-speed blender, combine all of the ingredients and blend until completely smooth and silky.


Salad

Ingredients:

1 bunch curly green kale
Mango Pineapple Salsa, from Trader Joe’s (or any salsa of choice)
Papaya Ginger Dressing
Shredded cabbage
Maple Glazed Walnuts

Instructions:

In a medium bowl, toss the shredded cabbage in a bit of the Papaya Ginger dressing, and coat well. Set aside.

Scoop some of the Mango Pineapple Salsa or any salsa of your choice onto the salad.

Top the kale leaves with a bit of the Ginger Papaya dressing, then use your hands to massage the dressing well into the leaves. The kale will soften and wilt as you go!

Transfer the massaged kale onto a serving plate; top with marinated cabbage, salsa and the Maple Glazed Walnuts.  Mmmmmmmmmmmm.


Enjoy!

Kelsey

Thursday, May 2, 2013

All About Oats Part 1: Homemade Granola

Granola has long held the reputation as a "natural health food," yet the nutritive benefits of most store bought granola are greatly diminished by high quantities of refined sugar and inflammatory vegetable oils.  Enter this homemade granola, adapted by yours truly from Alton Brown's Food Network recipe. Oats can be a great way to add soluble fiber, magnesium, and immune-boosting beta glucans to your diet, but sometimes plain old oatmeal can get a little routine.  (Getting bored with your oatmeal?  Check out this post on creative ways to spice up your oatmeal.)  Side note: make sure to always add some protein to your oatmeal, perhaps in the form of nuts, stirred in peanut butter, or even some protein powder to make your breakfast more well rounded and satisfying and to prevent a mid-morning blood sugar crash.  

I have been eating and baking with oats more often lately because they may help with breastmilk supply, and with four close friends having April babies I'm trying my hand at more oat-based recipes as gifts.  I love this adapted recipe, below, because it combines oats with dried fruits, dried unsweetened coconut, coconut oil, and nuts - all nutrient powerhouses.  Plus, with the fat and protein in the nuts and sweetness from a bit of honey, maple syrup and stevia, it causes much less of an insulin spike than your typical bagged granola.  Enjoy this granola atop organic Greek yogurt, mixed with almond milk and sliced banana, or just plain out of the bowl as a snack.  It stores well and makes a great gift, too!

Healthier Homemade Granola

Serves 6

Ingredients:

3 cups rolled oats
2 cups raw or dry roasted nuts (I used walnuts, almonds and cashews)
3/4 cup unsweetened shredded coconut or coconut flakes
1/4 cup honey
1/4 cup real maple syrup
1/3 cup organic coconut oil
1/2 to 1 cup raisins, cranberries or other dried fruit
3/4 teaspoon sea salt
Dash stevia
Cinnamon to taste

Instructions:

Preheat oven to 250 degrees F.  In a large bowl, combine oats, nuts, coconut and dried fruit.  


Combine all other ingredients in a separate bowl.  


Pour liquid mixture over oat mixture and pour onto two sheet pans. 


Cook for 1 hour 15 minutes to achieve an even color.  Mmmmmm...can't you smell that coconutty goodness already?  (Yes, coconutty is a word!)


Remove from oven, cool, and store in a glass bowl or containers.


Here was my breakfast - granola, almond milk, and bananas!  It was super fast, satisfying and definitely fulfilled my granola craving.  Plus, I am getting plenty of healthy fats - especially lauric acid from the coconut - which is so important for breastmilk quality.  (Not breastfeeding?  Coconut is awesome for your immune system, thyroid, and metabolism.)
 

Enjoy!
*M*

Sunday, July 8, 2012

Fig and Goat Cheese Crostini

When I spoke at the North Scottsdale Farmers Market 2nd anniversary celebration a few weeks ago, I had the pleasure of sampling a delicious crostini appetizer from Leonardo and Roberto's Gourmet Blends.  This local company sells flavored, gourmet vinegars and olive oils at farmers markets and online.  They feature unique flavors, such as Black Current Balsamic Vinegar and Blood Orange Olive Oil, are delicious on salads, entrees, side dishes, and even desserts!  Check out some of their awesome recipes here.

An amazing and thoughtful client of mine who came to the anniversary event bought me a bottle of the Vanilla Fig Balsamic Vinegar, knowing that I loved the flavor.  The folks from Gourmet Blends were also sampling this flavor as part of their fig and goat cheese crostini.  We inquired about the ingredients and decided to make our own crostini during a recent trip to Carmel.  I didn't bring the vinegar with me, as I didn't want to spill it in my suitcase, but I highly recommend that you pick up some of this awesome vinegar and try it out yourself.  Our finished product tasted pretty similar to what we sampled, so hopefully the recipe is close enough to the real deal!


The best thing about this recipe?  It looks fancy and has a complicated flavor profile but is super simple to make.  This crostini is going into my cocktail party arsenal!

Ingredients:

French baguette, sliced
8 oz goat cheese
3/4 cup walnuts, chopped
Jar of fig butter
Leonardo and Roberto's Gourmet Blends Vanilla Fig Balsamic Vinegar

Instructions:

Assemble ingredients.


Mix walnuts and goat cheese in a small bowl.  You can add more or fewer walnuts, depending on your preference.
 

Place the sliced bread on a baking sheet and pop it in the oven at 400 degrees for 5-10 minutes, or until lightly toasted.  You can also broil at 450 degrees for 3-5 minutes.  Don't bake/broil it for too long or it will become hard to chew.
 

Once the bread is toasty warm, spread each piece with fig butter.  We bought ours at Trader Joe's.


Top each crostini with some of the goat cheese walnut spread.  Again, you can use more or less than I did to your preference.  I used 1 1/2 - 2 tablespoons per piece.
 

Now here's the fun part.  Drizzle each crostini with vanilla fig balsamic vinegar.  Here I used balsamic vinegar glaze, which is a bit thicker than regular vinegar, and it was definitely delicious.  However, I missed the hint of vanilla and fig!
 

Here was my presentation to the family.  Pretty, huh?


Official taste testers.  The verdict?  Delicious.
 

Enjoy!

*M*

Sunday, April 1, 2012

Flourless Banana Bread

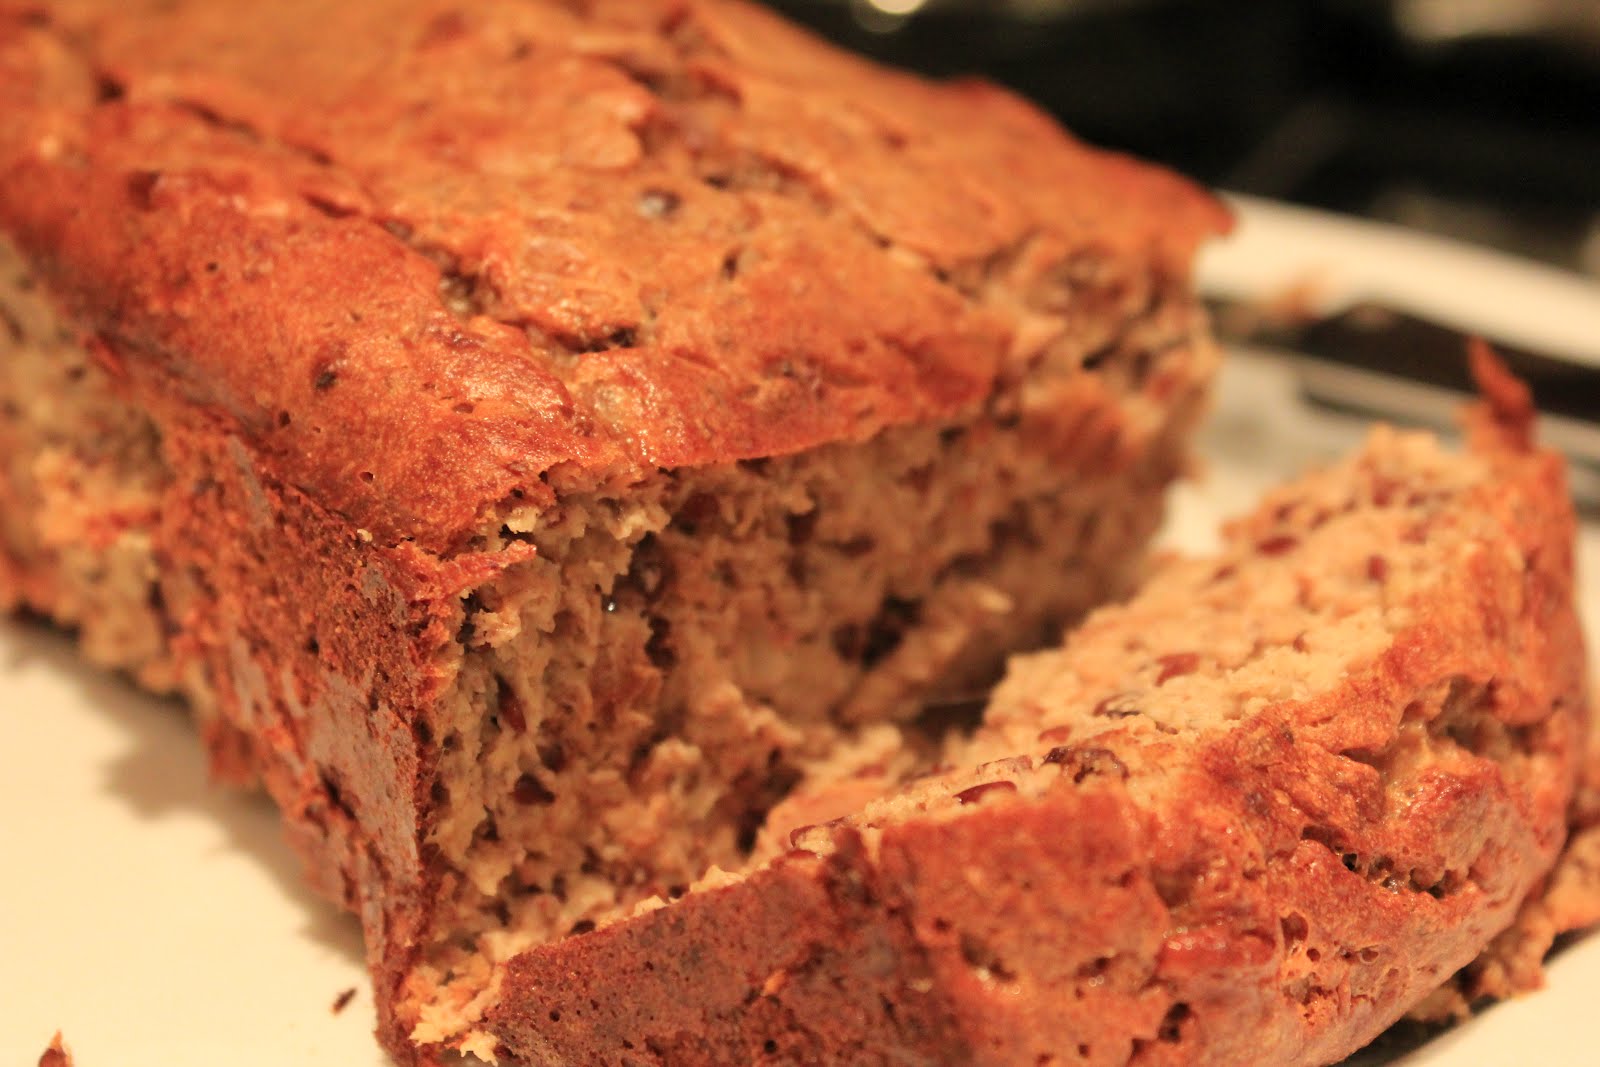
My husband loves banana bread, so when I came across this flourless banana bread recipe from one of my favorite sites - Spoonful of Sugar Free - I was excited to try it. At the same time, I was a bit skeptical: how can fruit, nuts, chia seeds and eggs make bread? I ended up becoming a believer after making this recipe and make it 2-3 times per month for my banana bread lovin' hubby. It's a low glycemic, whole food option that makes a complete meal - protein, fat, and "something from the ground" (the banana!).

I have made a few changes to the recipe. First off - and this is most important - it needs to be cooked longer than an hour. This bread can be too moist if it doesn't cook long enough. I also leave it out to sit overnight to "dry" out a bit. It sounds counter intuitive, but the second and third day are the best for this bread. Secondly, I stir in cocoa nibs for extra crunch and nutrients.

This recipe uses chia gel to draw the ingredients together. To make the gel, the recipe instructs you to combine 1 tablespoons of chia seeds with 9 tablespoons of water and wait for them to puff up (~20 minutes). You only need to use 3 tablespoons of this gel for the bread, but the recipe to make the gel makes more than 3 tablespoons, so you can either use it in a smoothie or just make less (try 2 tsp. chia seeds with 6 tablespoons water).

Ingredients:

3 ripe bananans
1/2 cup almond butter (can sub other nut butters too)
3 eggs
3 tablespoons ground flaxseeds
3 tablespoons chia gel (see above)
1/4 tsp. salt
1 tsp. baking powder
1 tsp. cinnamon
1 tsp. vanilla extract
Optional: 1/2 cup chopped walnuts
Optional: 1/4 cup cocoa nibs
Optional: stevia to taste

Instructions:


Chia seeds (pre-water):


Chia gel (after 20 minutes of soaking):


Preheat oven to 350 degrees. Mash bananas and mix all ingredients in a bowl.


Whole flaxseeds (ground are better, but my grinder wasn't working!):


Mmmm...cocoa nibs...


Pour the batter into a lightly greased bread pan or muffin tin. (I grease it with coconut oil.)


Bake for 60-75 minutes, or until toothpick comes out clean. Again, cooking it a bit longer (until the sides darken) prevents it from being too wet. The picture below shows a not-quite-done loaf, which is how I made it the first time. I keep it in another 10 minutes when I make it now.


Looks like bread with flour, eh?


The bread will rise in the oven but will sink when taken out. Let the bread cool for 15 minutes in the pan, which is necessary for the bread to set since it doesn't contain flour. Turn the pan over on a cutting board, slice, and enjoy! This is delicious slathered with a bit of peanut or almond butter, or maybe some pasture butter. You can also top it with smashed raspberries or sliced strawberries for a nutrient punch.

Enjoy!

*M*

Tuesday, March 27, 2012

Dairy-free Chocolate Cashew Butter Cups

I love having frozen chocolatey desserts on hand when a sweet craving strikes, and my usual go to is healthy fudge. In efforts to mix up my routine, I tried cashew butter cups from Dr. Ben Kim's website - and they are divine. I had made them before, but this time around I added the optional cocoa nibs to the filling, and their crunch and texture made this recipe one I will make time and time again. My husband, an ice cream fanatic, satisfies his sweet tooth with half of one of these dense, flavorful treats and doesn't need to head to Cold Stone.

If you have never used cocoa nibs, I urge you to give them a try. You will find them at Whole Foods or other health food stores. I especially enjoy Navitas Naturals brand. Cocoa nibs are made from the cocoa bean; they're pieces of dried, fermented and crushed bean that have a strong cocoa flavor and are chock full of flavonoids, antioxidants, and blood pressure-reducing power. Read more about cocoa nibs and how to use them here. I personally love to put them in my flourless banana bread (coming to the blog soon!), smoothies, and other healthy desserts.

These chocolate cashew butter cups are great because they're made with the nutrient powerhouses listed below:

Cashew butter - rich in healthy fats, iron, phosphorus, calcium, magnesium and zinc
Coconut oil - high in heart-protective medium chain triglycerides and has antiseptic qualities
Cocoa nibs/cocoa powder - heart healthy chocolate without added sugar or soy lecithin
Honey - a natural sugar that also contains minerals and fights germs

Note: I doubled this recipe to make 12 large cups, which I cut in 1/4 or 1/2 for each serving.

Ingredients

Chocolate ingredients
1/2 cup cocoa powder
1/4 cup honey (you can sub some liquid stevia here if desired)
1/4 cup coconut oil

Filling ingredients
1/2 cup cashew butter
1 T cocoa nibs (optional - I'd recommend more, perhaps 2 T)
1/2 T honey (I used stevia)

Instructions


Mix the ingredients for the chocolate together. Make sure to mix well.


Use a spoon to spread this mixture on the bottom and up the inside of each cupcake liner (note: I was out of liners so just placed these directly in the pan; not as clean but works just fine). It helps to spoon a large glob of the mixture into the liner and then spread it in a thick layer.

Put these prepared liners in the muffin pan (to help each cup maintain its shape) and place in the freezer.


Set aside the chocolate mixture that's left over; you'll use it in a few minutes.

While the cups are resting in the freezer, mix the filling ingredients together. Make sure to mix well.


Once your filling is ready, take the muffin pan out of the freezer and fill each cup with the cashew filling. Make sure you leave enough room at the top of each cup for a final layer of chocolate.

Place the cups back in the freezer for 10 minutes.


Once the 10 minutes are up, bring the muffin pan out and top off each cup with the rest of the chocolate mixture. Place the muffin pan back in the freezer for 20-30 minutes to let the cups harden. Then peel the cupcake liners off and enjoy!


Here's my iPhone camera attempt to show you the cocoa nibs in the center:


Please note: These chocolate cashew butter cups get harder and more enjoyable with each passing day, so consider saving a few to enjoy as an after-dinner dessert a day or two after making them.

Make sure to keep these puppies frozen; otherwise, they get messy as they melt!

Tell me, what's your favorite dessert ("healthy" or "play")?

Enjoy!

*M*