Changing for the better, one bite and (deep) breath at a time.

Sunday, April 25, 2010

Sunday Taco Night

Tonight's dinner was absolutely wonderful. Arizona is starting to get its first taste of 90 degree weather, which makes for superb evening temps and lazy dinners on the patio. I've never made grilled fish tacos, so I figured tonight was the night. (Thanks to Lauren and Terra for your suggestions on a marinade!)

As with most of my cooking ventures, I experiment with whatever is in my cupboard to find flavor combinations I like. For these tacos, I made a marinade of really high quality lemon-infused extra virgin olive oil (thanks to Greg's aunt Ana and uncle Steve), lime juice, cayenne, paprika, garlic powder, onion powder, onions, salt and pepper. It sounds complicated, but all you have to do is see what spices you have at your disposal and start sprinkling. I didn't have cilantro, but I would have added that too.


Pour whatever marinade concoction you have over the fish. I used fresh talapia.


Chill the fish, covered, in the refrigerator for at least 20 minutes.

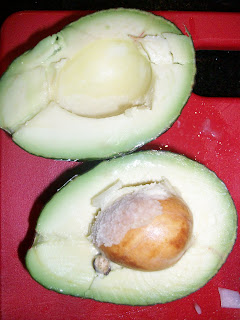
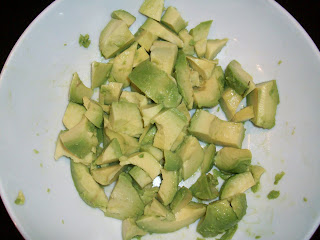
In the meantime, I made guacamole. My organic avocados were not quite fork "mush-able," so after cutting them in half, removing the pit (but don't throw it away!), scooping the flesh out with a spoon, and cutting it into chunks, I put it in my hand-held food processor (which is also an immersion blender).


Scooped and cut up:


In the processor:


This is becoming my new favorite kitchen tool, especially when I don't want to chop a whole lot.

Keep the pits to place in the guacamole if you're saving any. It will prevent it from browning.

Next, add chopped onion and tomato to taste. I like really chunky guac, so I'm not shy with the add-ins.


Now stir in the magic: lime juice, garlic (fresh or powdered), salt, and a bit of cholula or tobasco. Delicious!

I like to serve it with Trader Joe's vegetable flax-seed chips. Trust me, these chips have passed the taste test with even the most discriminating eaters (KIDS!), so I'm sure you'll like them. They're slightly healthier than regular tortilla chips because of the various vegetable powders and flaxseeds. Make sure to avoid the soy flaxseed chips, which TJ's also carries, since they have so much processed soy.

Now, while my wonderful hubby put the fish on the BBQ for about 4-5 minutes a side, I prepped the tortillas and fixins. I picked organic whole spelt tortillas (from Sprouts) because spelt is a little higher in protein than wheat and has a great texture. Additionally, I don't eat a lot of spelt, so they're good to add to the mix for some variety in taste and nutrients. These tortillas are thick yet soft, and they're durable enough for a big burrito or taco. If using corn tortillas, choose organic, as most conventional corn is genetically modified. Just wrap them in foil and heat in the toaster/convection oven. Without the foil, they get dried out.


I heated black beans in the toaster/convection oven and put diced tomatoes, a cabbage mix, salsa, guacamole, organic cheese, and a "crema" sauce in bowls. The "crema" is actually organic sour cream, lime juice, and cholula (not exactly authentic), but it's really good.


Once the fish was done grilling, I shredded it into small pieces, and the taco-building began. I couldn't even finish one taco because it was so big and full of goodness! We took our dinner out on the patio for some dining al fresco.


Here are two other family members (plus one temporary transplant) who also wanted tacos...too bad they just got a few black beans.


I think my little boy dog Waldo thought he could lick some guacamole off my face if he got close enough.


Sunday night dinners are a great time to regroup and relax before a big week. The best part? Leftovers for lunch tomorrow! Just bring a tortilla!


Here's to a happy, healthy week.

*M*


Monday, April 19, 2010

Healthier Than Average Pizza

Do you ever crave some really awesome pizza? Me too! Just because I'm a dietitian doesn't mean I was born without taste buds. When I want to go out for pizza, I enjoy Pizza Picasso in North Scottsdale. They have an awesome gluten-free crust that is dense and delicious, and my favorite pizza there has a whole bunch of interesting veggies and ricotta cheese. It's divine. When I don't want to spend a bunch of money on gourmet pizza, however, I make some at home.

I haven't found a great gluten-free or sprouted wheat crust, so I just use Trader Joe's whole wheat pre-made dough. Surprisingly, there aren't that many ingredients, and it does have some whole wheat flour in it, so it's at least a little healthier than your average pizza crust. The beauty of making pizza at home is that you get to choose your toppings. I'm a fan of topping-heavy pizza, the kind you can barely pick up it's so full of goodies. Some of my favorite toppings are mushrooms, onions, red bell peppers, eggplant, broccolini, goat cheese, and chicken sausage (in any combination). It's also fun to make a caprese-style pizza with buffalo mozzarella, sliced tomatoes, and fresh basil. I might even do a BBQ chicken pizza every once in a while. The one I'm showing below is pretty basic: onions, mushrooms, and chicken sausage. (Needless to say, it was my husband's idea...I usually pile on a few more veggies!)

Start by turning on the oven. This dough requires 450 degrees.

To save money (and be sure of the ingredients added), I make my own pizza sauce. It's pretty simple and much cheaper than the premade sauce. Pick up a 6-ounce can of organic tomato paste.


For one pizza, put about half of a can's worth of tomato paste in a bowl and add water, stirring to blend. I can't tell you exactly how much to add, as I do it by "feel," but you want the sauce thinner than marinara sauce but not so watered down that it won't stick to the pizza. Add spices to taste as desired. I have a "pizza blend" spice variety, but you can use garlic, basil, rosemary, oregano or any Italian spice you can think of. Also consider adding a little stevia or raw sugar, or maybe a bit of olive oil. I also stir in sea salt and black pepper to taste.


Next, prep your ingredients. My mushrooms came sliced (yes, a lazier way...but easy on a busy weeknight), and I just chopped some onions and precooked chicken sausage. Here are the beautiful chopped onions.


Next, prep your dough. The Trader Joe's whole wheat pizza dough comes premixed and refrigerated. All I do is roll the dough out onto a baking sheet with some whole wheat flour. It doesn't make the most beautiful circle because it does not stretch easily, but the finished product has a nice "classic" crust thickness. Here it is topped with pizza sauce.


I like to add a little shredded organic mozzarella first:


Next, add the toppings:


Add a little more cheese (I like an organic Italian cheese blend) and pop in the oven. You'll see here that I was making 2 pizzas, hence the excessive amount of chopped onions seen above.


After about 15 minutes, the pizza is ready, with bubbling cheese and a soft crust:


Doesn't this look good? Now, make sure to round out the meal with a green salad filling half of your plate. Top with some homemade olive oil-based dressing, and sprinkle raw parmesan on top:


Now, that's better than delivery, isn't it? Enjoy!

*M*

Tuesday, April 13, 2010

Crockpot Chicken Curry - So Easy!

I have always been a bit intimidated about cooking Indian food. I love eating it, but I always thought it would be so hard to make. I'm no expert on Indian cuisine, but this recipe is pretty darn good, and it's so simple.

The recipe calls for coconut milk. I used light coconut milk, which is basically watered down coconut milk (no fake ingredients). Feel free to use regular coconut milk; I just find that it's a bit too heavy for my preference. I did add a tablespoon of raw coconut oil back into the recipe to get just a bit more fat and coconut flavor without using the whole can of coconut milk. Remember to use as many organic vegetables as possible, and of course, go for organic chicken! You don't want to add hormones and antibiotics to such a delicious dish, do you?

This recipe is from Rachael Ray's website. Check it out here.

Indian Style Crockpot Curry
Serves 4

  • 1 13.5-ounce can coconut milk
  • 1 tablespoon tomato paste
  • 2 tablespoons curry powder
  • 1 teaspoon ground coriander
  • 1 teaspoon ground cumin
  • Few dashes hot sauce
  • 1 medium onion, chopped
  • 2 to 3 cloves garlic, finely chopped or grated
  • 1-inch knob ginger, peeled and grated
  • 1 green bell pepper, seeded and chopped
  • 1/2 large eggplant, peeled and cut into chunks
  • 2 medium sweet potatoes
  • 1 14-ounce can chick peas, drained and rinsed
  • 2 pounds bone-in skinless chicken thighs (about 6 thighs)
  • Salt and freshly ground black pepper
  • White rice
  • 1 lemon, cut into wedges, to garnish
  • 2 scallions, thinly sliced, to garnish
  • 1/2 cup chopped cilantro, to garnish
  • 1 cup chopped toasted peanuts, to garnish
  • 1/4 cup mango chutney, to garnish

Preparation:

In the bowl of a crock pot combine coconut milk, tomato paste, curry powder, coriander, cumin, and hot sauce. To that, add onion, garlic, ginger, bell pepper, eggplant, sweet potato, chickpeas, and chicken. Season with salt and pepper. Turn the crock pot on high heat and simmer for 4 hours or until the chicken is cooked through.

Megan's version: since I like to prep the night before, I refrigerate the prepared ingredients to put on the crock pot in the morning. I omitted the coconut milk until the morning so that the vegetables wouldn't soak it up. Here are some shots of how I prepared it.

All the vegetables together:


Seasoning (minus coconut milk) added:


Chicken added:


When finished, serve atop rice and garnish with lemon wedges, scallions, cilantro, peanuts, and mango chutney. I omitted the lemon and mango chutney, but go for it if that's you're thing! It was absolutely delicious.


Tuesday, April 6, 2010

How to Manage a Brunch


Easter brunch at the Camelback Inn

Sunday brunches and all-you-can-eat buffets can be overwhelming, even for the most intuitive eater. Many of us roll out of a brunch like this and promise that we'll never eat this much again...at least until the next holiday. We want to enjoy ourselves and remember the event for the people we shared it with, yet it can also be hard to honor our fullness and not eat until we're uncomfortable. Here are a few tricks to managing a meal like this and feel satisfied, yet comfortable, as you leave.

1. Survey your options

Take a few minutes to walk around the brunch or buffet and see what options are available. Take a few deep breaths, enjoy the scenery (especially if you visit the Camelback Inn!), and decide what you truly want. When faced with really special, gourmet foods, you'll want to make sure to try the foods you don't get too often. At this brunch, I walked around and tried to see what sounded truly good to me. I'm usually more interested in "lunch" foods than "breakfast" ones, so I knew I wanted lox, caprese salad, marinated vegetables, a quesadilla, a crab cake, and scallops.


The meat and fish station

2. Pick a small plate

You will always have a chance to go back for more if you're still hungry, so use a smaller plate (if possible) and fill it with small amounts of different types of foods. Subconsciously, we feel more satisfied if we see a "full" plate. Furthermore, it will help prevent wasted food, since we often take a lot more than we need when filling a big plate. Look how full my plate looks...and it's an appetizer plate!


3. Aim for balance

Try to get a few different types of fruits or vegetables with your meats/fish, grains, and cheese. Choose more unusual ones that you don't often get to have, like roasted portobello mushroom or avocado. I added salsa and guacamole to my quesadilla, onions and tomatoes to my lox, and loaded upon roasted mushrooms and squash. Of course, choose fruits and veggies you really like and that will truly satisfy you. If you have salads every day, maybe this time you'll try something new.

4. Eat slowly and mindfully

If you know me, you'll know I'm all about mindful eating. We often never give our food a chance; as we're chewing our food, we're loading up the fork with the next bite. At a brunch or buffet, you will have a chance to have really delicious or unusual foods. Take the time to enjoy them and really taste them! Put your fork down between bites so that you can give your taste buds a chance to really taste the food and your stomach a chance to tell you how much more you need to eat. I often advise my clients to eat as if they were wine tasting - the point of eating is to really enjoy the food as you're eating it!

5. Go back for seconds if you're not quite full or satisfied - but get only what you really like

When I went back for another plate, I knew all I wanted was some crab cake, the delicious scallops, and some gorgeous fruit. I only had a few bites of each, but I was really happy with my choice. I felt satisfied, not stuffed.

Here are what some of my fellow diners chose for brunch:


Remember: the most important thing about a meal is the ones with whom you share it. Enjoy your food, honor your body by listening to its signals, and be there for companionship and memory-making.

Monday, April 5, 2010

Crockpot Turkey with Bulgur, Feta, and Olives

This is one of my all-time favorite crockpot recipes...and it's so simple and healthy! I got it from Betty Crocker's Slow Cooker cookbook. It uses bulgur, which is a whole grain that is creamy in texture when cooked this way. I simply pair this recipe with steamed herbed vegetables, and it's warm, satisfying, and healthy.

Recipe:
2 to 2 1/2 pound bone-in turkey breast half, thawed if frozen (organic)
1/2 tsp salt
1/2 tsp dried oregano leaves
1 C uncooked bulgur
3 T lemon juice
1 tsp dried oregano leaves
1/4 tsp pepper
4 medium green onions, sliced (1/4 cup - I used more)
1 clove garlic, finely chopped
1 can (14 1/2 oz) ready-to-serve chicken broth (organic)
1/4 cup pitted Kalamata or Greek olives
1/4 cup crumbled feta cheese

1. Sprinkle turkey with salt and 1/2 tsp oregano. Mix remaining ingredients except olives and cheese in 3 1/2 to 6 quart slow cooker. (Below is me adding fresh lemon juice to the dry bulgur.)


Place turkey on top.


2. Cover and cook on low heat setting 4-5 hours or until juice of turkey is no longer pink when center is cut. Remove turkey from cooker; cut into slices. (I simply shred the turkey, removing the bones. It's very soft and shreds easily with a fork while still in the crock pot.)

3. Stir olives and cheese into bulgur mixture.


Stir with turkey and serve with steamed, seasonal, locally-grown veggies.


Note: To save time, prepare the ingredients the night before and store in the fridge overnight. Simply place in the crock pot in the morning and add about 8 ounces of chicken broth, as the bulgur will have soaked up a lot of the broth.

Enjoy!

*M*